CABINET VISION
Cabinet Vision Integration
Maximising efficiencies whilst minimising waste is the goal of any business wishing to increase profits. Linking Jobman to your CAD CAM and accounting software and even online shop software can;
- Reduced double data input.
- Minimise human error.
- Minimise time wasted.
- Move processes along faster.
- Highlight other inefficiencies.
Read this article in full before executing.
For versions CV8 and earlier. Please go to the notes at the bottom of this article.
Material Import
Basically what we are trying to accomplish is the alignment of product codes between systems. Jobman only requires Qty and Product Codes for this to work. The Product code can be placed after the description after a # symbol. Eg; Blum Motion 110 Inserta #71B3590
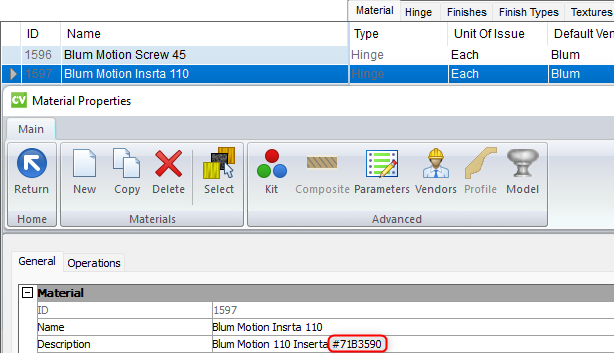
![]() Note: JM Sync can query the report.mdb table for hardware items and the psnc_cv.mdb for sheet counting. Jobman can identify product codes in the report database (for hardware items) in the SKU field in versions 9 and onwards or by placing the #productcode after the description. Board material quantities are only properly known when optimised and why it needs to point to the psnc_cv.mdb in the NC database. Currently there isn’t an SKU field in this database so placing a product code after the description on board materials is only possible for Jobman’s recognition to populate Jobman.
Note: JM Sync can query the report.mdb table for hardware items and the psnc_cv.mdb for sheet counting. Jobman can identify product codes in the report database (for hardware items) in the SKU field in versions 9 and onwards or by placing the #productcode after the description. Board material quantities are only properly known when optimised and why it needs to point to the psnc_cv.mdb in the NC database. Currently there isn’t an SKU field in this database so placing a product code after the description on board materials is only possible for Jobman’s recognition to populate Jobman.
JMSync
The JMSync Installer package will be supplied by your integrator. Download and double click the installer package.
![]()
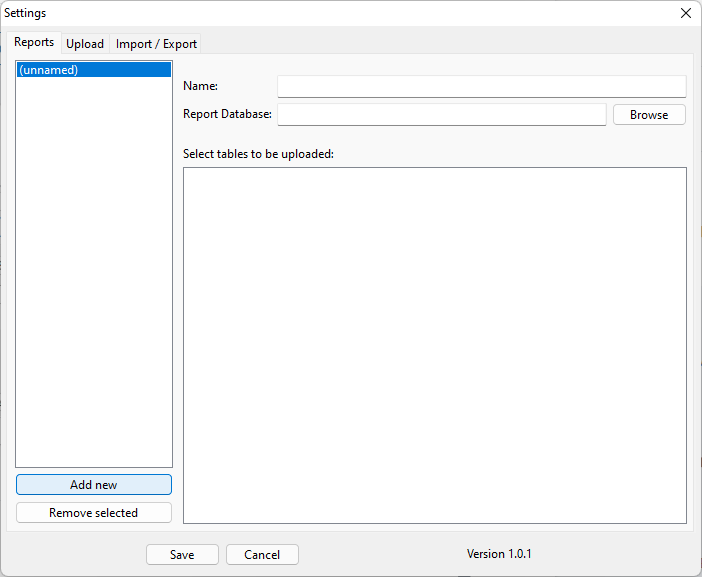
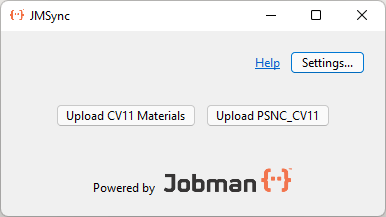
This will launch the following screen. Click on the settings button.

Add new reports for purchased functionality in Jobman.
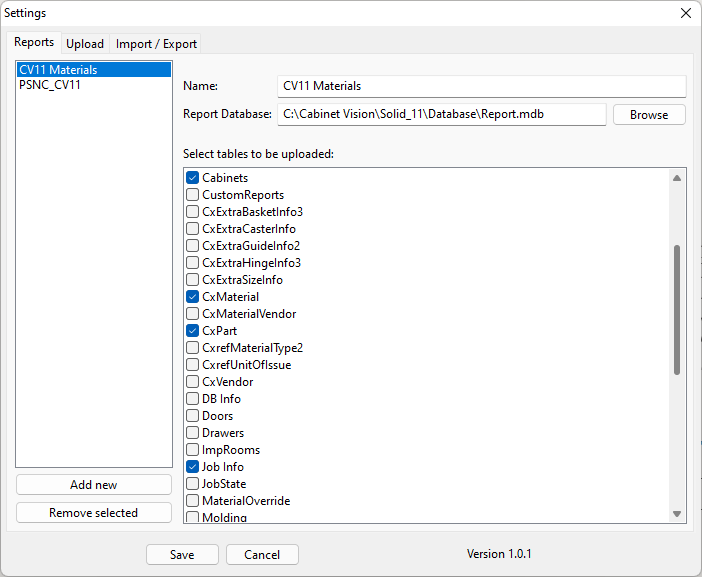
Materials Report
- Name: CV(Version Number) Materials
- Report Database (For local installations): C:\Cabinet Vision\Solid_(CV Version Number\Database\Report.mdb
- Report Database (For network installations): Do a search for report.mdb on your server.
When correctly mapped the tables should show as below. Select Cabinets/CX Part/Job Info/Parts/CX Material (Highest number)/CX Part/Rooms and then save.
![]() Note: If you don’t get a CxPart as an option in the JM Sync report profile, you will need to add this to your report properties in your Cabinet Vision. To add inside a job drawn, click on the Reports tab, click Report Centre, highlight the saved/created materials report, then switch from File to the Main tab where you will see Report Properties, click and add in the CxPart option. Once saved, open JM Sync, and under settings this will be a report profile option to query the report.mdb table.
Note: If you don’t get a CxPart as an option in the JM Sync report profile, you will need to add this to your report properties in your Cabinet Vision. To add inside a job drawn, click on the Reports tab, click Report Centre, highlight the saved/created materials report, then switch from File to the Main tab where you will see Report Properties, click and add in the CxPart option. Once saved, open JM Sync, and under settings this will be a report profile option to query the report.mdb table.

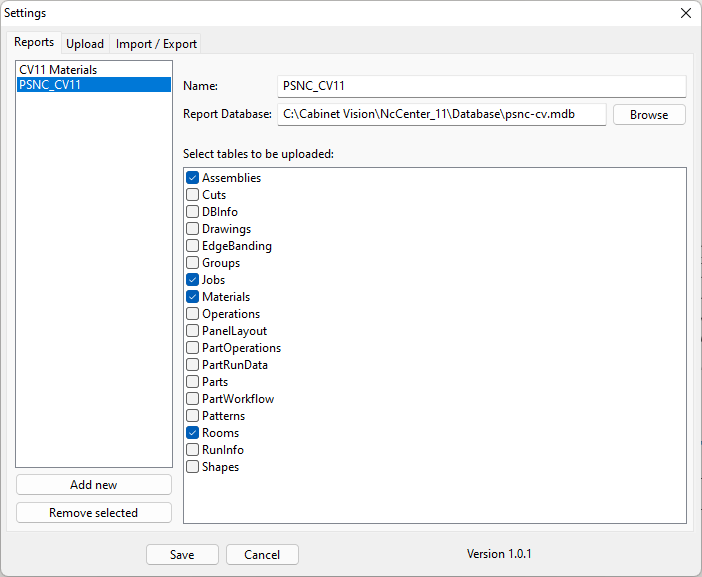
Product Tracking
- Add New
- Name: PSNC_CV(Version Number)
- Report Database: C:\Cabinet Vision\NcCenter_11\Database\psnc-cv.mdb
This will list all tables in that database. Select, Assemblies/Jobs/Materials/Rooms and then save.
Sheet Count
This feature has now been configured in JM Sync that will import sheets and the required quantity into your Job Raw Materials via the PSNC report upload. To set this functionality, you will need to apply the below additional report filters to your PSNC report profile in JM Sync.

By activating (ticking) the filters for PanelLayout and also Parts, this will allow the JM Sync application to extend the report table query out further to pick up the sheet count. Once these extra filters have been applied, and saved to the PSNC profile in JM Sync, you can then click on upload PSNC_CV(version #) to run the report upload.
![]() Note: Please ensure the exact same job number is labelled in both CV and Jobman.
Note: Please ensure the exact same job number is labelled in both CV and Jobman.

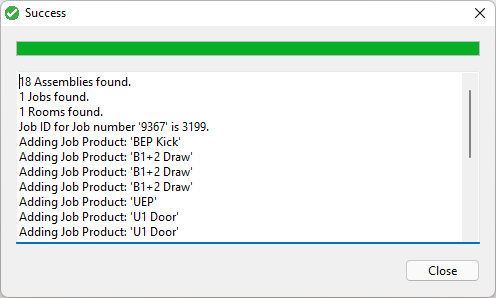
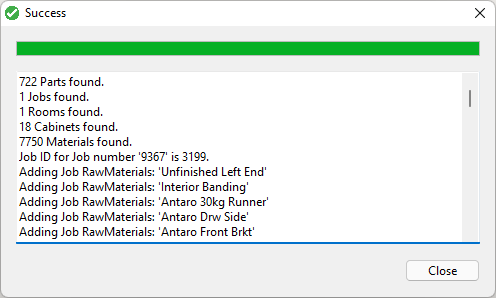
Once the report is uploaded, the ‘Success’ notification will display and show the add sheets and their qty added to the Job Raw Materials for that job number.

How the sheet count will populate into Jobman, inside the job, and under the Raw Materials tab.

 Note: Only sheets that have the #product code applied in the materials description field in your CV, and are set up with the same product code in Jobman availability chart items, will populate into the job.
Upload Directory
Next, we must tell it where we are telling the data to go. Copy and your Jobman URL followed by /cabinet_vision_upload.
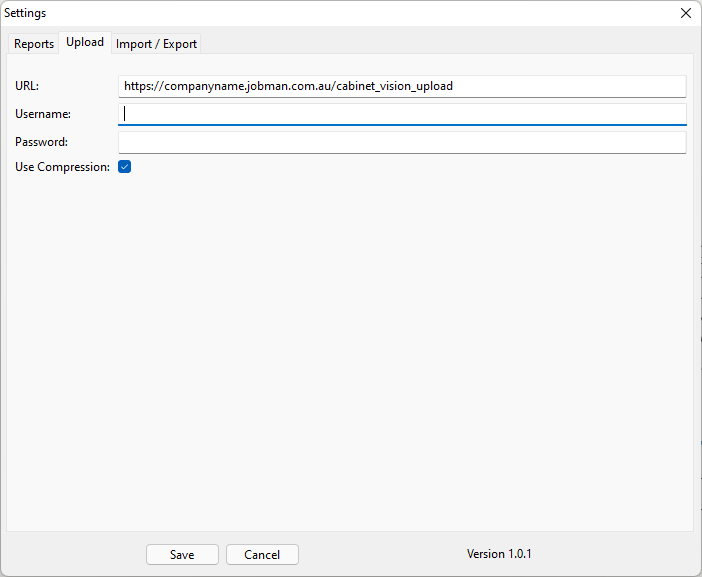
Click Save and you will now have created the required buttons to run the profiles.
As long as Cabinet Vision’s Job Number and Jobman’s Job Number are identical then clicking on either of the new buttons created will provide the following reports.
You should now see the following in your Materials database.
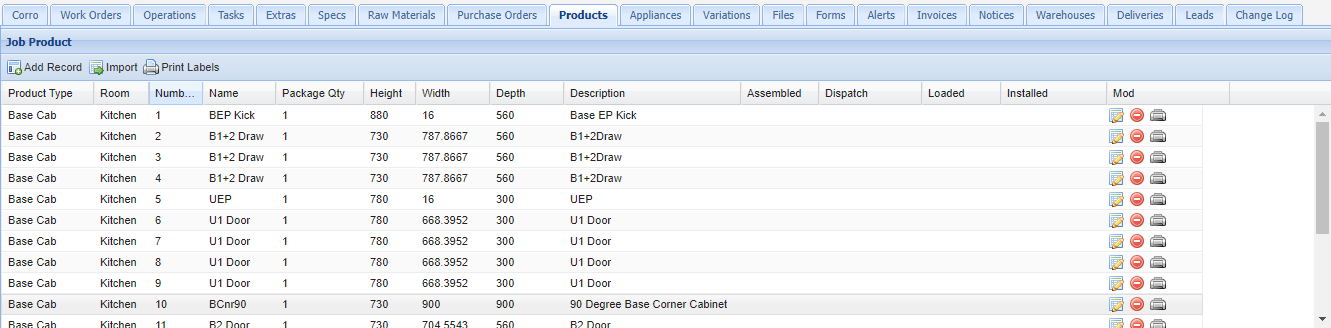
You should now see your Cabinets in the Products table. If this feature has been purchased from Jobman.
Populating Jobman’s Availability Charts
One way to populate your ‘Availability Charts’ from Cabinet Vision is achieved by firstly downloading the JOBMAN_V9_Material_Rpt package which will work in version 9 and onwards. This will require unzipping before packaging into CV. Enable the report in your report centre by going to Setup Reports and adding it to a report category. Go back to reports and select that report and let it run. It may take up to a minute to populate.
Another is to simply export the Material.CVM to a .csv and copy the required fields into Jobman’s Availability Chart items. Please read how to do this.
Then Export the report and select Text (CSV) Format

These are the settings to set in Cabinet Vision:
- Change the extension to a .csv.
- Check the file and delete anything thing you don’t want coming into Jobman.
Note: Jobman will only import materials with a Vendor ID and will separate anything after the # symbol and make it a Product code.

Save the file where you can retrieve it later.
Go to Jobman’s Availability Chart and go to the button Import CSV. This will present you with a drop-down option to select Cabinet Vision.

Select the path to where you saved your export (text.csv) and click upload.
This will now have all hardware items in Jobman.
Note:
- Stock Types will have to align with those of Cabinet Vision if you don’t want to create more stock types.
- Only items with a Vendor ID and product code in Cabinet Vision will import. Having these populated for you can be purchased and downloaded from www.solidsetup.com App Store.
- This feature is for Cabinet Vision version 9 and above.
Populating the Availability Charts from CV
With the import from CV material report into Jobman, the description field requires a product code after a # symbol because CV does not have a Product code field. Jobman then took any material in CV that had a Vendor ID greater than 0 to exclude Planit default materials and then imported the remaining materials assigned with a Vendor ID > 0 and then populated Jobman’s Availability Chart separating the Product Code after the # symbol to populate Jobman’s Product Code field.
The product code is the identifier between CV and Jobman.
Rate Types: Jobman will handle the rate/unit type EA (Each) for the CV raw material files, and also PR (Pair) for hardware items like the drawers which are purchased in as a pair rate/unit type.
![]() Note: If this a Vendors’s Code IE Blum is the one set in CV it must also be in one of the 3 additional Supplier codes. It will then use the Preferred Supplier Codes and Price for populating the Raw Materials that will then either deduct from stock or create a purchase order when the assigned source is clicked.
Note: If this a Vendors’s Code IE Blum is the one set in CV it must also be in one of the 3 additional Supplier codes. It will then use the Preferred Supplier Codes and Price for populating the Raw Materials that will then either deduct from stock or create a purchase order when the assigned source is clicked.
CV8 Notes: (Under development)
Material.cvm will also need to be added to your JMSync and run when database changes are made to the CV8 database. It will link the part id to the report table.
Materials CSV.File Import:
There is also an option for Cabinet Vision users to create a material summary report group, listing the materials/items required for a drawn Job, and save the report in an excel format, this will also require to be saved again once exported into a CSV. file to be able to import this into Jobman under the Job Raw Material.

The below image shows how the material set up is required in Cabinet Vision with each item listed with a #product code in the description field. The exact same item and product code will need to be listed in your availability chart items in Jobman for the items to import successfully in the Job Raw Materials.
![]() Note: This Material Summary report may not be available for all versions of Cabinet Vision, if you need assistance to create the report, you will require to speak with Cabinet Vision support.
Note: This Material Summary report may not be available for all versions of Cabinet Vision, if you need assistance to create the report, you will require to speak with Cabinet Vision support. 
When ready to assign the Job Raw Materials, open the job card, click the raw materials tab, then click the import icon, select the Cabinet vision CSV for the import type, the final step is to click ‘Browse’ to add the saved csv.file and click on upload.
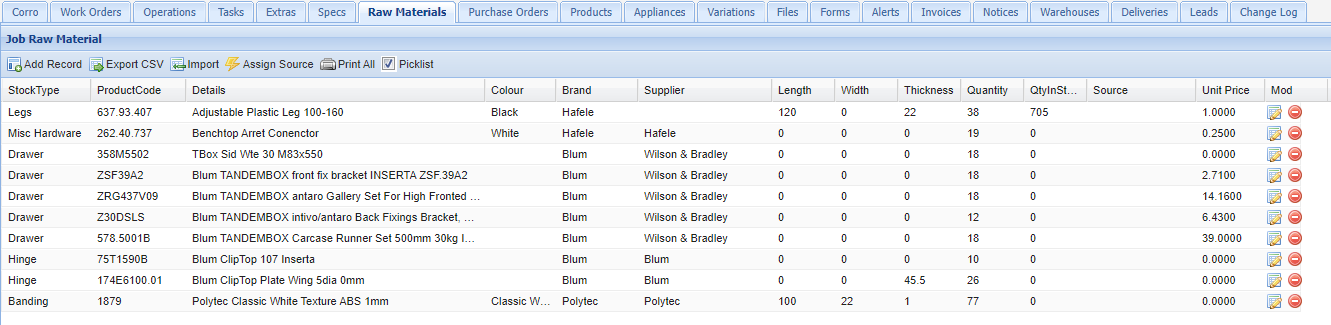
Once the upload of materials has been completed, and the items reference the exact same in both software, the raw materials will be populated as per below. Click on ‘Assign Source’ and this will label any items as Stock or Purchase Order.
![]() Note: For more instructions on creating purchase orders, click here: Purchase Orders
Note: For more instructions on creating purchase orders, click here: Purchase Orders
Sample csv.file for the Materials Summary report: