QUOTE TEMPLATES
To edit a quote template, follow the steps below.
- Admin>Templates >Quote Template link.
- You can have as many different templates as you like. When you’re ready to print a quote you will be able to select the template for your quote to be drawn on.
- Click on the little pencil icon
 to edit the template.
 - A pop up editing window will appear. If you know HTML you can click on the little HTML icon, which will allow you to edit the template at a lower-level than the WYSIWYG editor that is normally used.
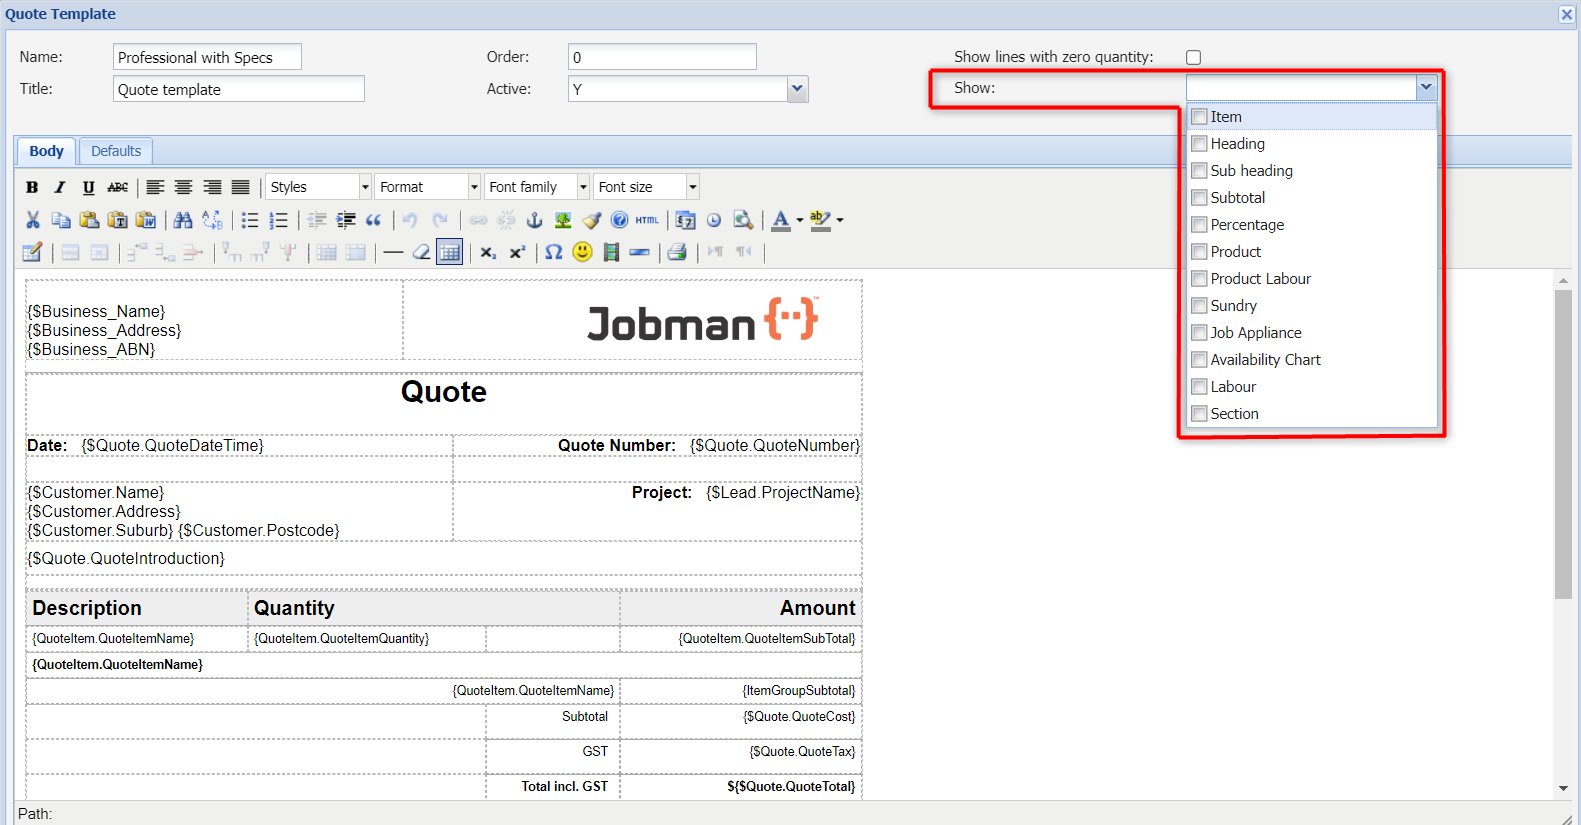
- You can select which items of a quote will be printed by selecting from the Show drop-down. With nothing selected, everything will be included in the printout. As soon as you select an item or more, only those will be included in the printout.
 NOTE: If you do not want to see lines with 0 values please uncheck the ‘Show lines with zero quantity’.
Click ![]() and the template will be saved and ready for use.
and the template will be saved and ready for use.
![]() Tip: It’s typically a good idea to have two windows open. One with a test quote and the other one editing the template. You can then make changes to the template and press ‘Print’ on the quote allowing you a preview of the quote for when it is printed.
Tip: It’s typically a good idea to have two windows open. One with a test quote and the other one editing the template. You can then make changes to the template and press ‘Print’ on the quote allowing you a preview of the quote for when it is printed.
Quote Template Page Break
When it comes to quoting in Jobman using sections, and you have many sections listed on the one quote, you may experience the sections incorrectly separating onto a new quote page. To correct this so the format looks much clearer and easier to review, you can add in to the HTML editor a code to add a page break. As shown below, you can add in the code for your page break where required on the template, which will see the text format break always over to the next page, instead of separating. This example is to break the listed default Quote Notes over to the next page, as these are quite long to fix correctly onto the one page.

![]() Note: You will require to apply the HTML code to setup a page break, which is listed here: <p style=”page-break-before: always;”>
Note: You will require to apply the HTML code to setup a page break, which is listed here: <p style=”page-break-before: always;”>
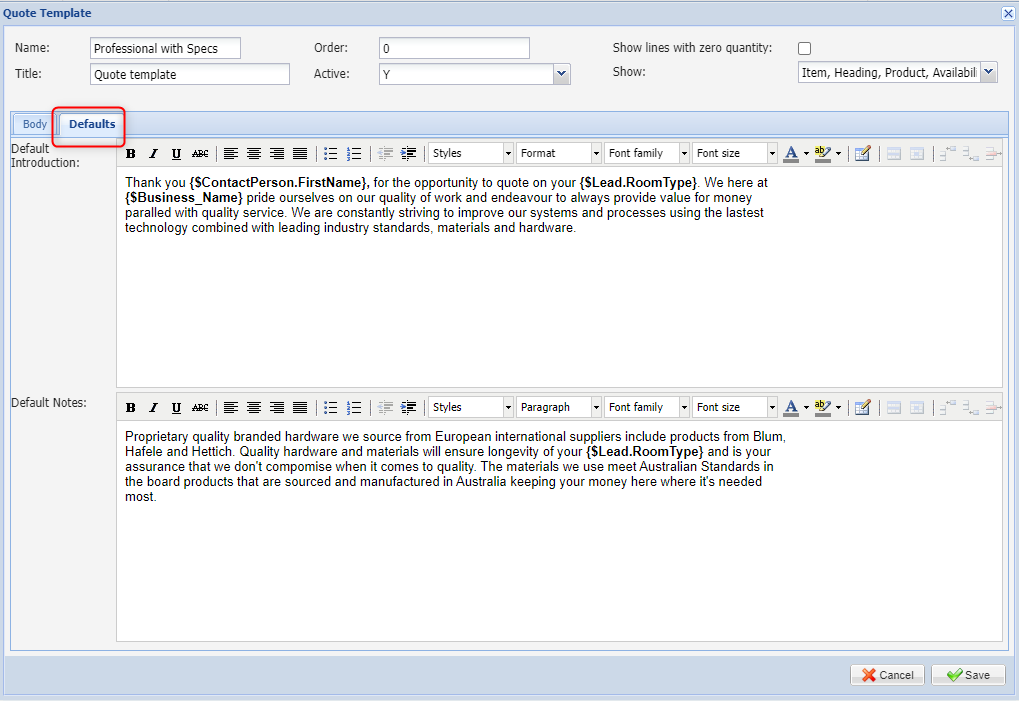
Quote Defaults
You can customize your quote Introduction and notes for this template allowing time-saving and correct terminology to be present at all times in your quotes.
First impressions matter the most so spend time getting these templates correct.
Adding Template Variables to a Quote Template
You can add a number of template variables to a quote template and create as many case specific quote templates as you require. You can find a range of template variables here.
These variables can be added to your quote template types as you edit the quote template as shown below. ![]() Note: These variables can be used in all template types (Generic, Corro, Notice, Invoice & Quote Templates)
Note: These variables can be used in all template types (Generic, Corro, Notice, Invoice & Quote Templates)
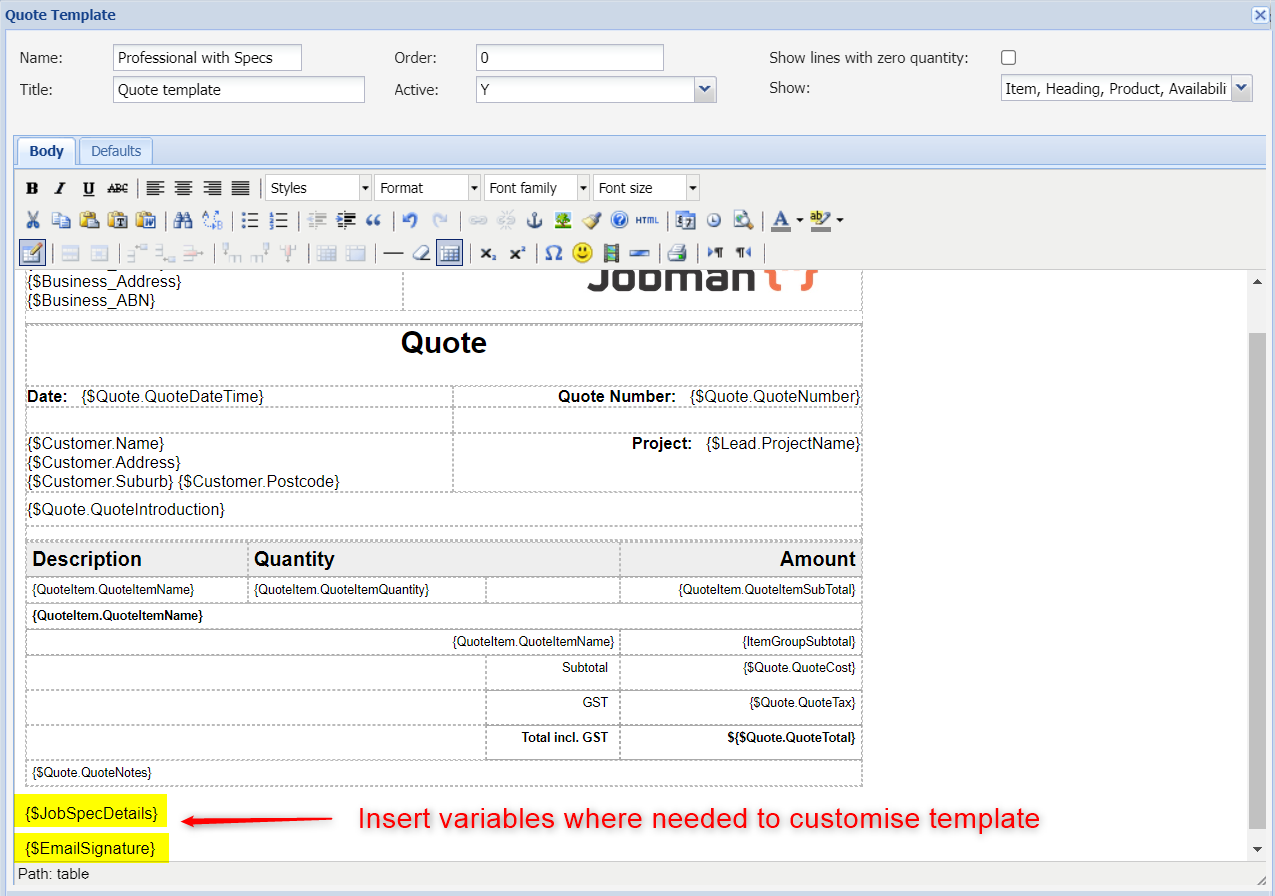
Example; Add the ‘Job Spec details’ and your email signature to a quote template.
Copy the {$JobSpecDetails} & the {$EmailSignature} template variables and paste them where you would like it to be located within the quote template. Click ![]() .
.
Select the print icon ![]() as shown below. These variable fields have now been added to the quote template and will show on every quote that is printed with this template.
as shown below. These variable fields have now been added to the quote template and will show on every quote that is printed with this template.

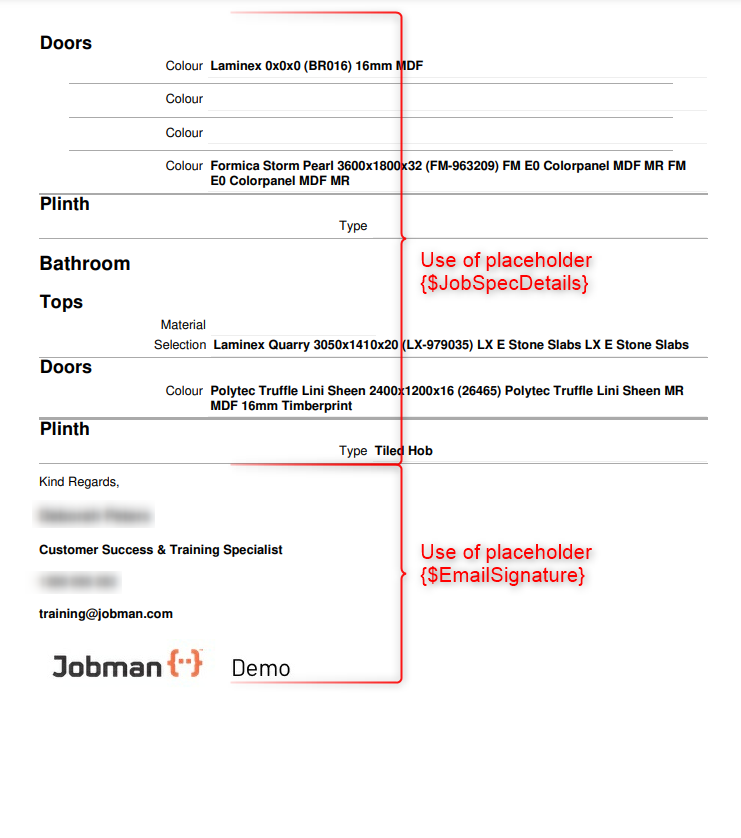
Example of Print to PDF with Placeholder Variables Added